Apple
Downgrade Big Sur (11.x) to Catalina (10.15) via an 11.x Host Computer
- Start with a 16GB USB drive. This USB will be erased. In our example, the USB is labelled "MyVolume"
- Download the Catalina installer for 10.15 ( https://support.apple.com/en-in/HT201372 ) from the apple app store (8GB). After downloading, the OS will try to run the installer and fail giving an error message. Just dismiss the dialog window and continue on.
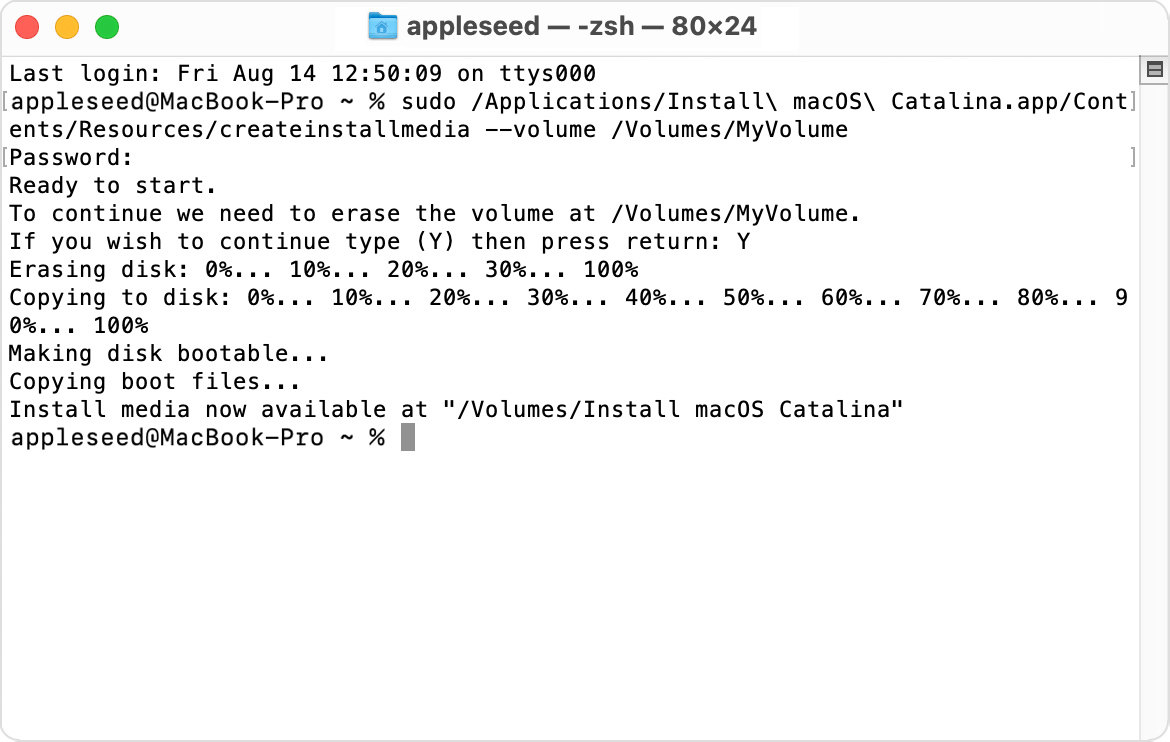
- Run "createinstallmedia" via the terminal window to create the installer:
- sudo /Applications/Install\ macOS\ Catalina.app/Contents/Resources/createinstallmedia --volume /Volumes/MyVolume

- Eject the installer USB
- Insert the installer USB into the computer and power it on while holding the Option key pressed until the boot selection screen appears:
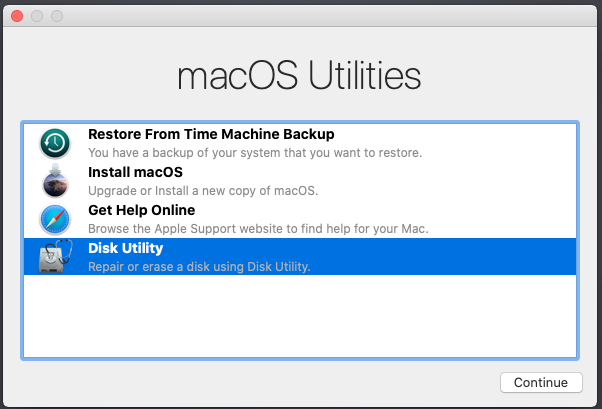
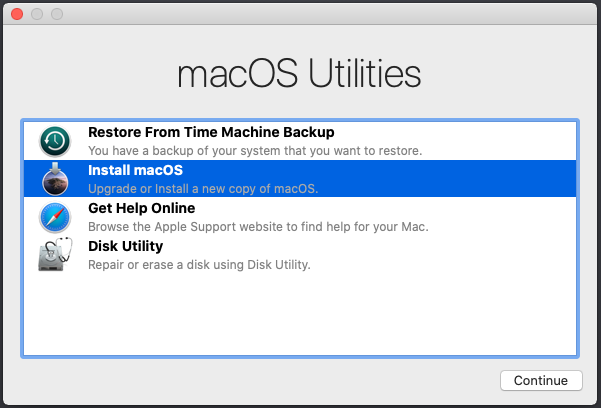
<screenshot> - Select the (working from a VM - look for recovery mode? utilities?)

- Use the disk utility to erase the Big Sur drive and then exit disk utility
- Install Catalina as normal.

- sudo /Applications/Install\ macOS\ Catalina.app/Contents/Resources/createinstallmedia --volume /Volumes/MyVolume
[top]
Disable MacBook Pro Dedicated GPU
Important Notes:
- I have recently come up with a MUCH better, PERMANENT solution to this issue, which I'd recommend using instead, if your AMD GPU has failed. This method will also allow brightness control and sleep mode to continue working as normal. More info can be found here.
- After performing the steps below, sleep mode and brightness control will NOT work properly on your system.
- First, ensure your machine is completely shut down (You can press Control + Option + Shift + Power keys to reset the SMC).
- Now, boot your machine while holding the Command + S keys. As the system boots, it should display white text on a black screen, and should eventually stop at a prompt.
- At this prompt, enter the following command and press Return:
nvram fa4ce28d-b62f-4c99-9cc3-6815686e30f9:gpu-power-prefs=%01%00%00%00 - Next, enter reboot, and press Return.
- Immediately after running the reboot command, hold down Command + R (if you're running OS X 10.11 or later) to boot into Recovery Mode. If you don't have a Recovery Partition, you can boot from a Mac OS installer USB drive.
- Once booted in Recovery Mode, open Terminal, and run the following command:
csrutil disable - Reboot the system.
- Once the system reboots, it should now successfully boot into your install of OS X. Now, you'll need to download the program found here.
- Run the program, follow the prompts, and enter your password when prompted.
- Once the tool finishes running, your system should now run without the dedicated graphics, and should work completely normally.
[top]
Essential Keyboard Shortcuts for Mac
| Shortcut | Action |
|---|---|
| Startup Shortcuts | |
| C | Boot from Optical Drive |
| D | Boot to Apple Diagnostics |
| N | Boot from a network server |
| T | Boot in Target Disk Mode |
| Shift | Boot in Safe Mode |
| Cmd + R | Boot to macOS Recovery |
| Option + Cmd + R | Boot to macOS Recovery over the internet |
| Cmd + S | Boot in Single-User Mode |
| Cmd + V | Boot in Verbose Mode |
| Option | Boot to Startup Manager, to pick other startup disks if available |
| Cmd + Option + P + R | Reset NVRAM or PRAM |
| Shift + Control + Option | Reset SMC |
| F12 or trackpad button | Eject removable media |
| Left Shift | Disable automatic login (if enabled) |
| Shift | (at login screen) Prevent Login items / Previous Windows |
| Global Shortcuts | |
| Shift + Cmd + 3 | Take screenshot of entire screen |
| Shift + Cmd + 4 | Take screenshot of selected area |
| Shift + Cmd + 4, then Space | Take screenshot of selected window |
| Cmd + A | Select all |
| Cmd + F | Find |
| Cmd + H | Hide current window |
| Option + Cmd + H | Hide all other windows |
| Cmd + M | Minimize current window |
| Option + Cmd + M | Minimize all windows |
| Cmd + W | Close current window |
| Option + Cmd + W | Close all windows |
| Cmd + O | Open |
| Cmd + P | |
| Cmd + S | Save |
| Cmd + C | Copy |
| Cmd + V | Paste (copy) |
| Option + Cmd + V | Paste (cut) i.e. move copied item to current location |
| Shift + Option + Cmd + V | Paste and match style |
| Cmd + Z | Undo |
| Cmd + ? | Help |
| Cmd + , (Comma) | Open Preferences for current app |
| Cmd + Space | Open Spotlight search |
| Cmd + Tab | Switch to the next open app |
| Cmd + ~ (Tilde) | Switch to the next window in the current app |
| Control + Cmd + Q | Lock the screen |
| Shift + Cmd + Q | Log out |
| Option + Shift + Cmd + Q | Log out instantly |
| Cmd + Option + Esc | Force quit |
| Cmd + Option + Eject | Activate Sleep mode |
| Shift + Control + Eject | Put display(s) to sleep |
| Cmd + Control + Eject | Quit all apps and restart |
| Control + Eject | Choose from Sleep, Restart, and Shutdown options |
| Finder Shortcuts | |
| Enter | Rename selected file or folder |
| Space | Open preview of selected file |
| Option + Space | Open preview of selected file in fullscreen mode |
| Shift + Cmd + G | Go to folder... |
| Shift + Cmd + N | Create new folder |
| Shift + Cmd + Delete | Empty the Trash folder |
| Option + Shift + Cmd + Delete | Empty the Trash folder immediately |
| Cmd + 1 | Icon View |
| Cmd + 2 | List View |
| Cmd + 3 | Column View |
| Cmd + D | Duplicate selected file or folder |
| Cmd + I | Get info |
| Cmd + J | View options |
| Cmd + N | Open new Finder window |
| Cmd + T | Open new Finder tab |
| Cmd + [ | Back |
| Cmd + ] | Forward |
| Cmd + Delete | Move selected item(s) to Trash |
| Cmd + Up | Move up one folder |
| Cmd + Down | Move down one folder |
| Cmd + Option + I | Show Attributes Inspector |
| Cmd + Control + N | With files selected, create a new folder and immediately move selected files into that folder |
[top]
Xcode Developer Tools
https://developer.apple.com/download/all/
https://en.wikipedia.org/wiki/Xcode