Video Capture of Computer Screens
Required Programs
- VLC Media Player - required for playback of just about any kind of video content you can imagine
- 7-zip - you will need this to extract the contents of the FFmpeg files, which are stored as a 7z archive. Mac OSX will use Keka
- FFmpeg - the ultimate Swiss Army Knife multitool of multimedia encoding/decoding
Installation
- VLC installs are straight forward. Run the installer and you're done.
- FFmpeg is a bit more complicated, and it depends on your platform.
Windows
- Run the VLC installer
- Install 7-zip
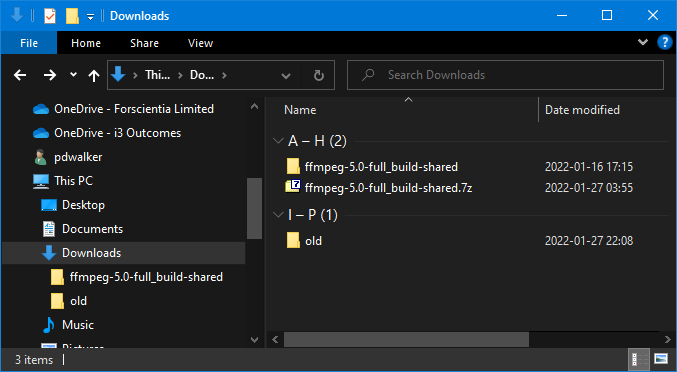
- Extract the contents of the FFmpeg zip file into a suitable directory. I going to use C:\Local\ffmpeg\ as my FFmpeg installation location for this example. You should see something similar to this:
The contents of the ffmpeg filder should look like this: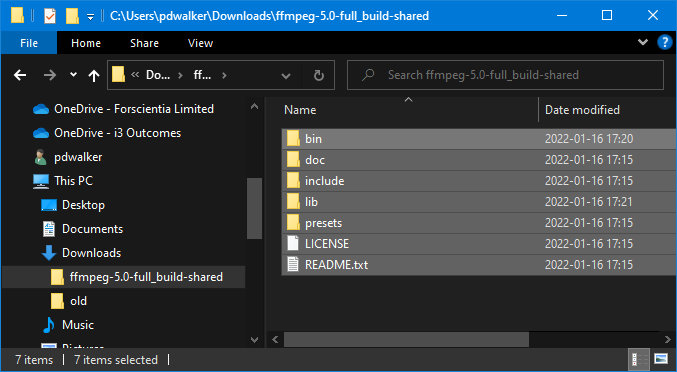
Select all the files and move them into the installation directory. That is C:\Local\ffmpeg\ in this example.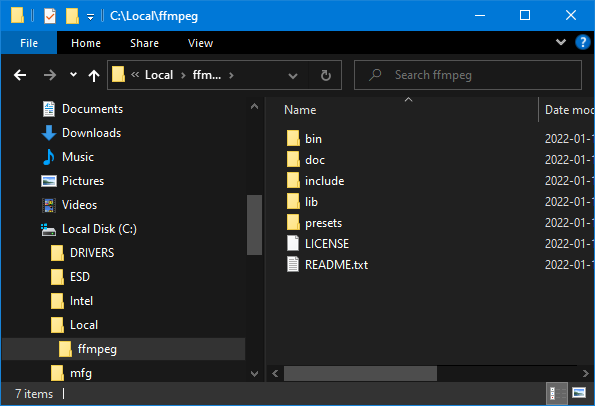
- Next, add the location of the ffmpeg\bin directory to the system path. This is necessary so you can run the command from the command line from a command shell.
Go to the file explorer, and look in the left hand folder list for "This PC" or "My PC" or whatever it is called on your system.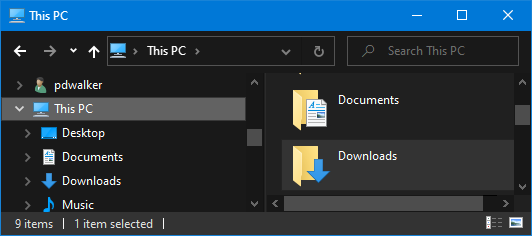
When you find it, right click in it to bring up the local context menu and select Properties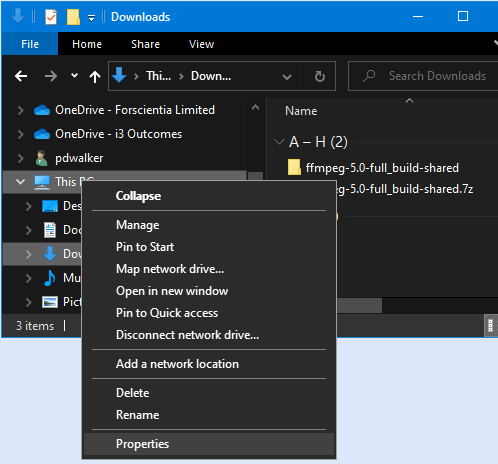
In newer versions of Windows, the properties page looks like this: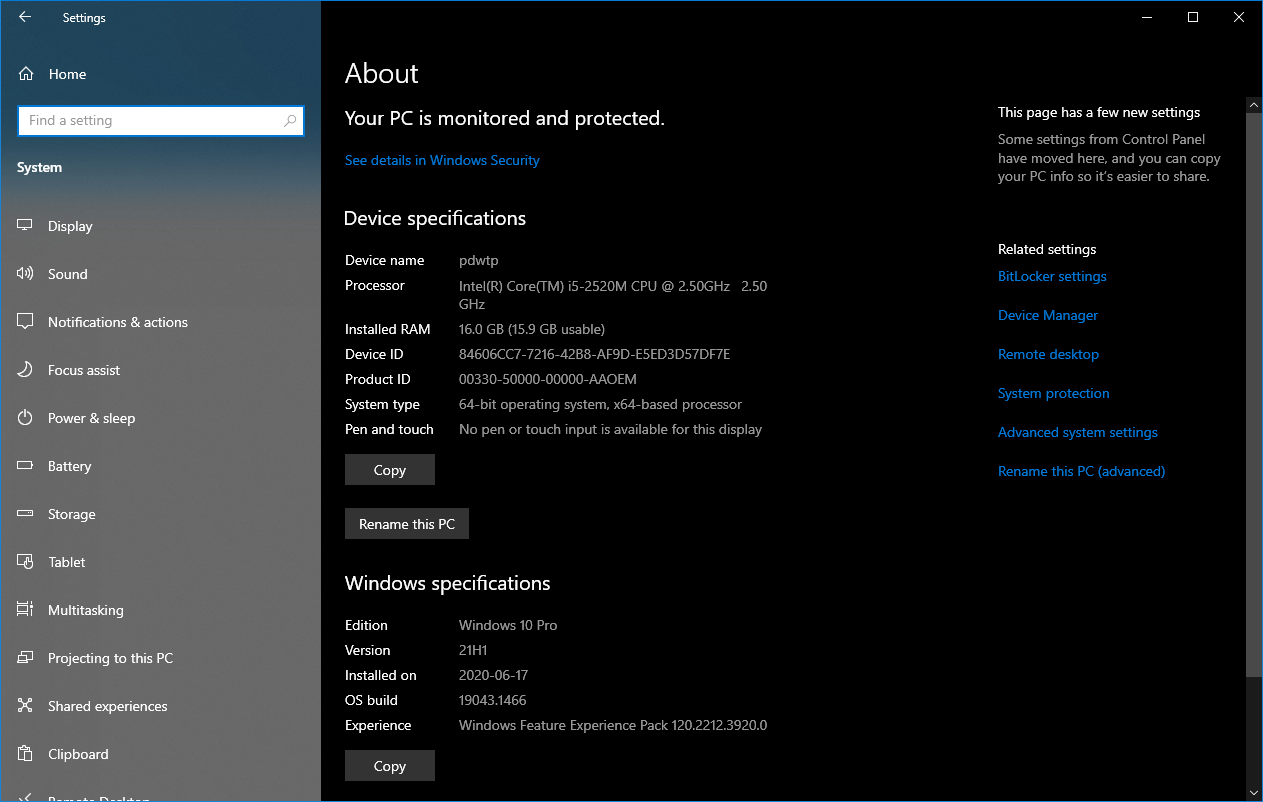
Look for the "Advanced system settings" (right middle in the above screenshot) and click on it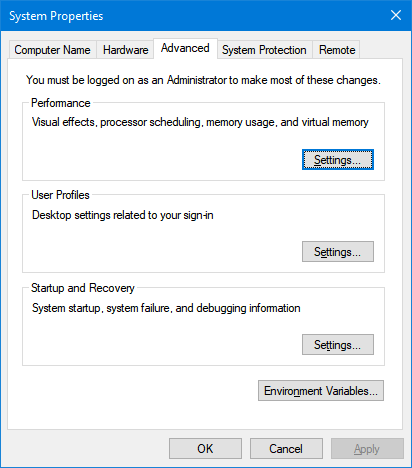
Select "Environment Variables" and the following screen will appear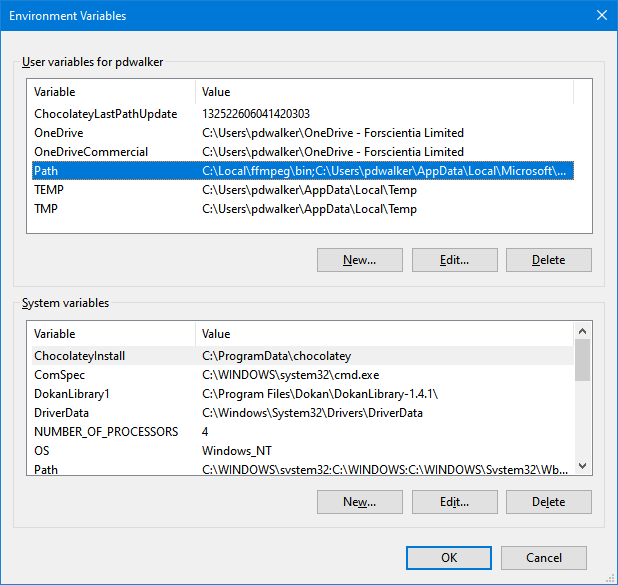
In the top half of the User variables section is an entry called "Path". Select it and click on "Edit". Do not edit the path of the System variables section unless you know what you are doing.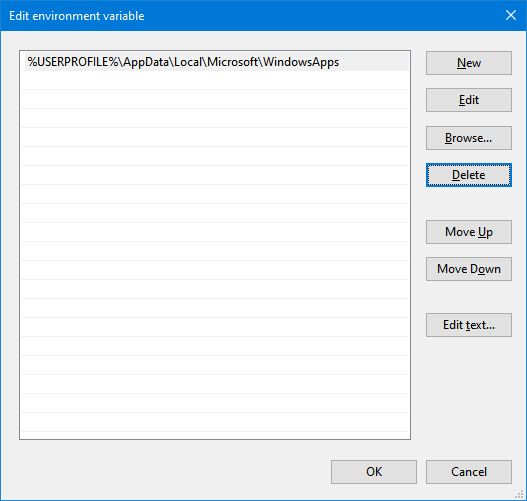
Click on "New" and add the following "C:\Local\ffmpeg\bin"
and then click on the "Move up" button until that new entry appears at the top of the list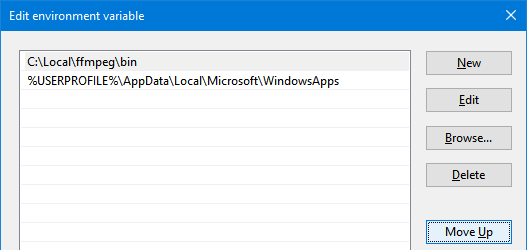
Click on OK, and ffmpeg will be available for use on the command line.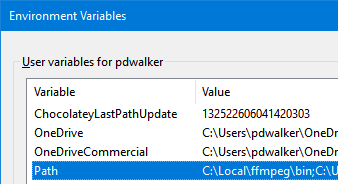
Click on OK to close the Environment Variables settings, and then click on OK to close the System Properties.
- Start a command line window by typing cmd.exe into the search bar and open the Command Prompt
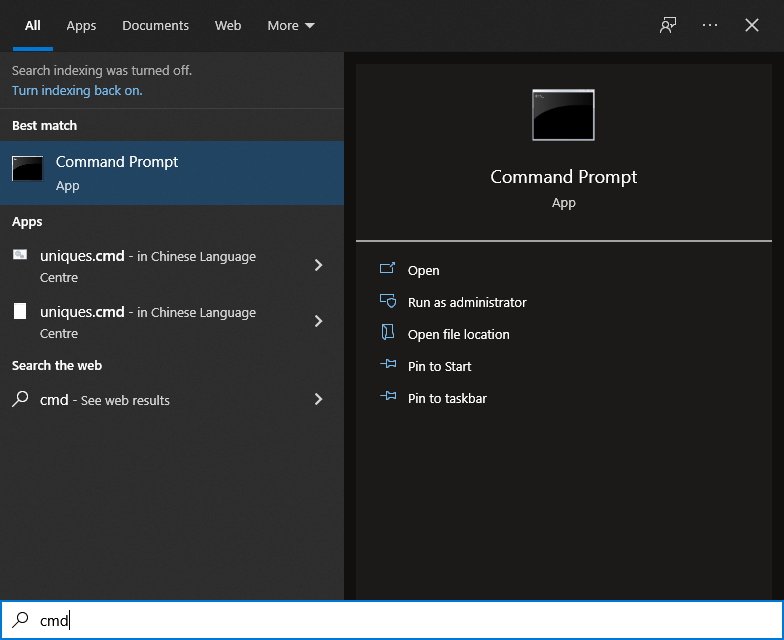
- in that command prompt, type in "ffmpeg" and you should see this:
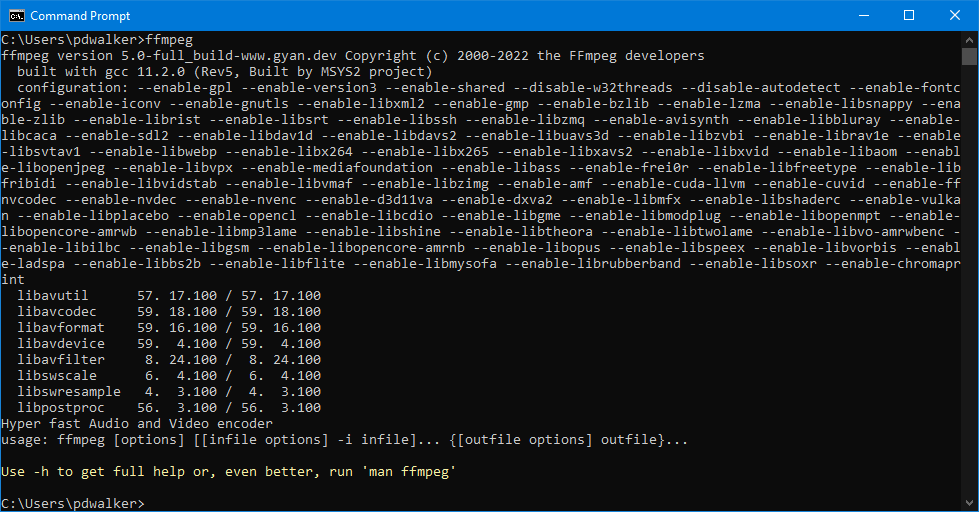
If you get an error like this, either you typed in the command incorrectly (as I did in the following example) or you did not configured your user path correctly and you have to go back and correct it
You are now ready to capture video
Mac OSX
- Install VLC
- Install Keka
- Install FFmpeg through the use of HomeBrew (recommended because of all the other useful things you can install if you like this kind of stuff) or install the statically linked binary version of the FFmpeg binaries from https://evermeet.cx/ffmpeg/. This file will need to be placed into a directory that's on your path (not yet described how to do)
The statically linked installation is going to be faster and easier to do than the homebrew version.
Video Capture
Windows
Open a command window, and run the following commands:
cd Desktop
ffmpeg -f gdigrab -t 6 -draw_mouse 1 -framerate 60 -i desktop -c:v libx264rgb -crf 0 -preset ultrafast screenCapture.mkv
This will create a video file called "screenCapture.mkv" on your desktop that you can replay using VLC Media Player.
The parameters to the ffmpeg command have the following meanings
| -f gdigrab | gdigrab is the windows framebuffer, where the screen is stored |
| -t 6 | capture 6 seconds of video and exit. 3600 = 1 hour, 14400 = 4 hours. If you omit this parameter, the capture will continue until you press [Control C] to gracefully tell ffmpeg to stop |
| -framerate 60 | if you want to see the candles paint second by second, you should have a framerate of at least 60. Technically speaking, you actually need 120, but let's not get too crazy. |
| -draw_mouse 1 | capture the mouse pointer |
| -i desktop | capture the entire desktop - remember to maximize your window |
| -c:v libx264rgb | this video encoder will preserve the rgb color values losslessly |
| -crf 0 | lossless compression |
| -preset ultrafast | save the data as quickly as possible, don't waste too much time compressing the data |
If you want to save the for long term storage, you can losslessly compress the file even further with the following command
fmpeg -i screenCapture.mkv -c:v libx264rgb -crf 0 -preset veryslow screenCaptureS.mkv
It'll take a while, but it will create a video file that should be less than half the size of the original.
Mac OSX
Open a terminal window and run the following commands:
cd ~/Desktop
ffmpeg -f avfoundation -t 6 -pixel_format 0rgb -capture_cursor 1 -capture_mouse_clicks 1 -framerate 60 -i "1:" -filter:v "format=yuv444p" -c:v libx265 -crf 0 -preset ultrafast screenCapture.mkv
This will create a video file called "screenCapture.mkv" on your Desktop that you can replay using VLC Media Player.
The parameters to the ffmpeg command have the following meanings
| -f avfoundation | gdigrab is the windows framebuffer, where the screen is stored |
| -t 6 | capture 6 seconds of video and exit. 3600 = 1 hour, 14400 = 4 hours. If you omit this parameter, the capture will continue until you press [Control C] to gracefully tell ffmpeg to stop |
| -framerate 60 | if you want to see the candles paint second by second, you should have a framerate of at least 60. Technically speaking, you actually need 120, but let's not get too crazy. |
| -pixel_format 0rgb | get the data as RGB colors instead of some bizzzare color model |
| -capture_cursor 1 | capture the mouse pointer |
| -capture_mouse_clicks 1 | and capture the clicks with an onscreen visual notification |
| -i "1:" -i title="window title" | capture the first screen. Not really important unless you have multiple screens and you are not capturing the primary screen. Use 'ffmpeg -f avfoundation -list_devices true -i ""' to list the capturable devices on your computer |
| -filter:v "format=yuv444p" | transform the input colors into this color format, which is fairly quick when converting from RGB and without too much color shifting (I'm still looking to improve upon this - the windows encoding has an exact RGB color modelling which means no color shift) |
| -c:v libx265 | encode the video using H.265 compression. It makes for smaller videos without consuming too much processing time |
| -crf 0 | lossless compression |
| -preset ultrafast | save the data as quickly as possible, don't waste too much time compressing the data. |
There is no point in trying to compress this video any further with these parameters. Further compression will require a lot of time and cpu power to see any further gain.
Audio Capture
Windows
Mac OSX
References
FFmpeg documentation:
Lossless capture:
- https://video.stackexchange.com/questions/25034/lossless-capture-with-ffmpeg
- https://video.stackexchange.com/questions/8305/lossless-screen-recording-software
- https://trac.ffmpeg.org/wiki/Capture/Desktop
Video editing programs
- black magic davinci resolve
- kdenlive
- shotcut
Tips
Screen capture portion of a screen
ffmpeg -y -f avfoundation -t 6 -pixel_format 0rgb -capture_cursor 1 -capture_mouse_clicks 1 -framerate 60 -i "1:" -filter:v "format=yuv444p" -filter:v "crop=1920:1080:320:180" -c:v libx265 -crf 0 -preset ultrafast screenCapture.mkv
extract audio
ffprobe <videofile> to determine the audio format
ffmpeg -i <filename> -y -ss 01:50:47.0 -t 0:02:03 -vn -c:a copy <outputaudio>.aac (assuming audio is aac as determined by ffprobe above)